MicroPython - Class 2
MicroPython - Class 2
Example Files
Raspberry Pi Pico 2 W Pinout
https://datasheets.raspberrypi.com/picow/pico-2-w-pinout.pdf
MicroPython Kit

This $11 Kit Contains:
* Pico 2W development board (with headers)
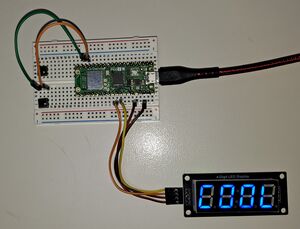
* TM1637 - 4 digit display, 0.56" (with colon)
* Inland 400 Tie-Point Breadboard
* Pushbutton(s)
* Dupont connector wires
Pins – Controlling / Using Pins
Input
# define input with pull-up
button = machine.Pin(18, machine.Pin.IN, machine.Pin.PULL_UP)
Input - Interrupt
# define input with pull-up
button = machine.Pin(18, machine.Pin.IN, machine.Pin.PULL_UP)
# interrupt with falling edge of signal
button.irq(trigger=machine.Pin.IRQ_FALLING, handler=button_change)
The function, "button_change" will get called with each interrupt
Output
led= machine.Pin(17, machine.Pin.OUT) # Define output
Special Function
sda_pin = machine.Pin(14) # define the pins to use
scl_pin = machine.Pin(15)
#create I2C bus object
i2c_bus = machine.I2C(1,sda=sda_pin,scl=scl_pin, freq=400000)
https://docs.micropython.org/en/latest/library/machine.I2C.html
Exercises
1. blink.py – Blink the on-board LED
2. button.py – Turn LED on when button is pressed
3. interrupt.py – Receive call-back when button is pressed
4. debounced_input.py – Using library, “debounced_input.py”, debounce button presses/releases
TM1637 Display
The TM1637, 7-segment display and keypad scanner IC, uses an “I2C Like”
2 wire serial interface to drive multiple 7-segment displays.
This interface uses DIO and CLK signals that are driven like an I2C interface
to “bit-bang” commands and data to the display chip.