STM32L152-DISCO: Difference between revisions
Jump to navigation
Jump to search
No edit summary |
No edit summary |
||
| Line 30: | Line 30: | ||
-> C:\Users\Jim\STM32Cube\Repository\STM32Cube_FW_L1_V1.10.2\Projects\32L152CDISCOVERY\Examples | -> C:\Users\Jim\STM32Cube\Repository\STM32Cube_FW_L1_V1.10.2\Projects\32L152CDISCOVERY\Examples | ||
Although there are plenty of example projects, I couldn't find the "demo" example. | Although there are plenty of example projects, I couldn't find the "demo" example. | ||
From the STM32L152-DISCO page, https://www.st.com/en/evaluation-tools/32l152cdiscovery.html#documentation | |||
Click on the "Tools and Software" tab, and download STSW-STM32072, STM32L1 Discovery firmware package (RN0079) | |||
I downloaded en.stsw-stm32072.zip. It contained example code for current sensing, and touch sensing. | |||
The folder, "AN3413-Currenct_consumption_touch_sensing", may be the "demo" project that's pre-programmed on the board. | |||
'''Strangeness''' | '''Strangeness''' | ||
Revision as of 23:26, 19 November 2020
The STMicro STM32L152-DISCO development board provides a developer a low power processor with an LCD segment display,
a user defined button, a capacitive touch slider, two user defined LEDs - green & blue, and an on-board USB ST-Link JTAG interface.
I've been wanting to dive a little deeper with low power devices, and this appears to be rather good development board for that.
Hardware
STM32L152RCT6 low power processor, 32MHz max, with 16KB RAM, 256KB FLASH
Two pushbuttons Black: Reset, Blue: User defined
Four LEDs LD1 (red/green) for USB communication,
          LD2 (red) for 3.3V power
          LD3 (green) user defined
          LD4 (blue) user defined
Capacitive Touch Sensor - Slider / 4 Buttons

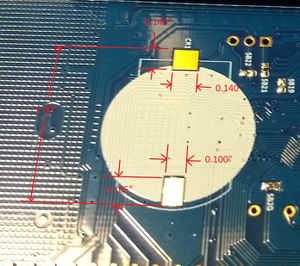
On the backside of the development board are pads for a CR2032 coin cell, directions indicate:
"Solder a B7410AP2L battery holder from LOTES on CR1".  (This battery holder appears to be as scarce as hen's teeth.)
After firing up STM32CubeMX, Selecting "STM32L152C-DISCO" from the Boards Select menu, and then clicking "Start Project",
select "YES" when asked to initialize all peripherals with the default Mode.
Go to the Project Manager tab, give the project a name, select "MDK-ARM" for toolchain.
the zip file, "stm32cube_fw_l1_v1100.zip" was downloaded.  This contains all the library files and example code needed to build
projects with this development board.
Unpacking
Right after taking the board out of the box, be sure to backup the initial code if you ever want to
restore it.  Use the ST-Link Utility to backup the FLASH memory to a file.
Example Projects
Example projects can be found in C:\Users\UserName\STM32Cube\Repository
-> C:\Users\Jim\STM32Cube\Repository\STM32Cube_FW_L1_V1.10.2\Projects\32L152CDISCOVERY\Examples
Although there are plenty of example projects, I couldn't find the "demo" example.
From the STM32L152-DISCO page, https://www.st.com/en/evaluation-tools/32l152cdiscovery.html#documentation
Click on the "Tools and Software" tab, and download STSW-STM32072, STM32L1 Discovery firmware package (RN0079)
I downloaded en.stsw-stm32072.zip.  It contained example code for current sensing, and touch sensing.
The folder, "AN3413-Currenct_consumption_touch_sensing", may be the "demo" project that's pre-programmed on the board.
Strangeness
It appeared the program would "flake out" while performing the sleep current measurements.
Pressing the reset button would restart the demo, but it would again "flake out" during sleep current measurements again.
After unplugging the board and reconnecting it, the board resumed "normal functionality".
This strange behavior occurred after using the ST-Link to backup up the program FLASH.
It's possible the ST-Link was responsible for this behavior...
